Deploying Spin Apps Using GitHub Actions
- Prerequisites
- Create a Spin Application in a GitHub Repository
- Create a Personal Access Token
- Save the Personal Access Token as a Repository Secret
- Create the Deployment Workflow
- Push the Workflow to GitHub
- Next Steps
GitHub Actions is a Continuous Integration and Continuous Deployment (CI/CD) platform for GitHub developers. With GitHub Actions, developers can create workflows that build, test and even deploy (to production) pull requests that have been merged into their repositories. Workflows are composed of actions, of which there are thousands, published by companies and individual enthusiasts alike, that automate otherwise mundane, repetitive in-house development tasks.
Fermyon provides a set of actions for working with Spin. For example:
fermyon/actions/spin/setup- installs the Spin CLI and necessary pluginsfermyon/actions/spin/push- pushes a Spin application to a registryfermyon/actions/spin/deploy- deploys a Spin application to Fermyon Cloud
In this tutorial, you’ll create an application and deploy it from GitHub to Fermyon Cloud using the fermyon/actions/spin/deploy action. Upon completing this tutorial, you should have a GitHub repository that builds and deploys a Spin application to Fermyon Cloud every time you merge a pull request to main. Let’s get started!
Prerequisites
To ensure the tutorial goes smoothly, please check you have the following:
- Spin 1.0 or above installed. You can check the version using
spin --version. - Spin templates installed. You can check with
spin templates list. - The GitHub CLI installed.
- A Fermyon Cloud account that is set up via your preferred GitHub user account
Create a Spin Application in a GitHub Repository
If you’d like to work with one of your existing Spin applications, and you’ve pushed that application to GitHub, you can skip this step. Instead, open a command line on your application directory. The tutorial assumes that your application manifest is a file named
spin.tomlin the root directory of your GitHub repository; if that’s not the case, you may need to change some details of the workflow.
The first step is to create a GitHub repository for your application. You can do this either on GitHub’s UI or via the GitHub CLI using the gh repo create command. We’ll use the GitHub CLI below for illustrative purposes.
# Create the github-actions-tutorial repo on GitHub and clone a working copy.
$ gh repo create github-actions-tutorial --public --clone
Now let’s create a Spin HTTP application using a template.
Type the spin new command, as shown below:
$ spin new -t http-rust
Enter a name for your new application: github-actions-tutorial
# Choose y at the prompt
github-actions-tutorial already contains other files. Generate into it anyway? [y/n]

Description: A GitHub Actions App
HTTP path: /...
Make sure the name matches the repo you just created, otherwise the application won’t be generated into the repo working copy.
$ spin new -t http-ts github-actions-tutorial --accept-defaults
# Choose y at the prompt
github-actions-tutorial already contains other files. Generate into it anyway? [y/n]
Make sure the name matches the repo you just created, otherwise the application won’t be generated into the repo working copy.
$ spin new -t http-py github-actions-tutorial --accept-defaults
# Choose y at the prompt
github-actions-tutorial already contains other files. Generate into it anyway? [y/n]
Make sure the name matches the repo you just created, otherwise the application won’t be generated into the repo working copy.
$ spin new -t http-go github-actions-tutorial --accept-defaults
# Choose y at the prompt
github-actions-tutorial already contains other files. Generate into it anyway? [y/n]
Make sure the name matches the repo you just created, otherwise the application won’t be generated into the repo working copy.
Push your new application to GitHub:
$ cd github-actions-tutorial
$ git add .
$ git commit -m "Basic Spin application"
$ git push --set-upstream origin main
You’ve now got a Spin application in GitHub, ready to add a deployment workflow.
Create a Personal Access Token
When you deploy from the Spin command line, you log into Fermyon Cloud using your browser. Of course, that’s not possible in an unattended environment like GitHub Actions. Instead, you’ll use a Personal Access Token (PAT). Let’s create one now.
-
Open Fermyon Cloud > User Settings. If you’re not logged in, choose the Login With GitHub button.
-
In the “Personal Access Tokens”, choose “Add a Token”. Enter the name “Tutorial” and click “Create Token”.
-
Fermyon Cloud displays the token; click the copy button to copy it to your clipboard.
Once you close the token dialog, you can’t re-open it. Leave the dialog open, or paste the token into a text editor, in case your clipboard accidentally gets overwritten before the end of the next step.
Save the Personal Access Token as a Repository Secret
For your deployment workflow to use this new PAT, you must save it as a GitHub repository secret. The steps for this are different according to whether you prefer to use the GitHub Web user interface or the command line:
Open the GitHub Web site and navigate to your repository.
Choose the Settings tab.
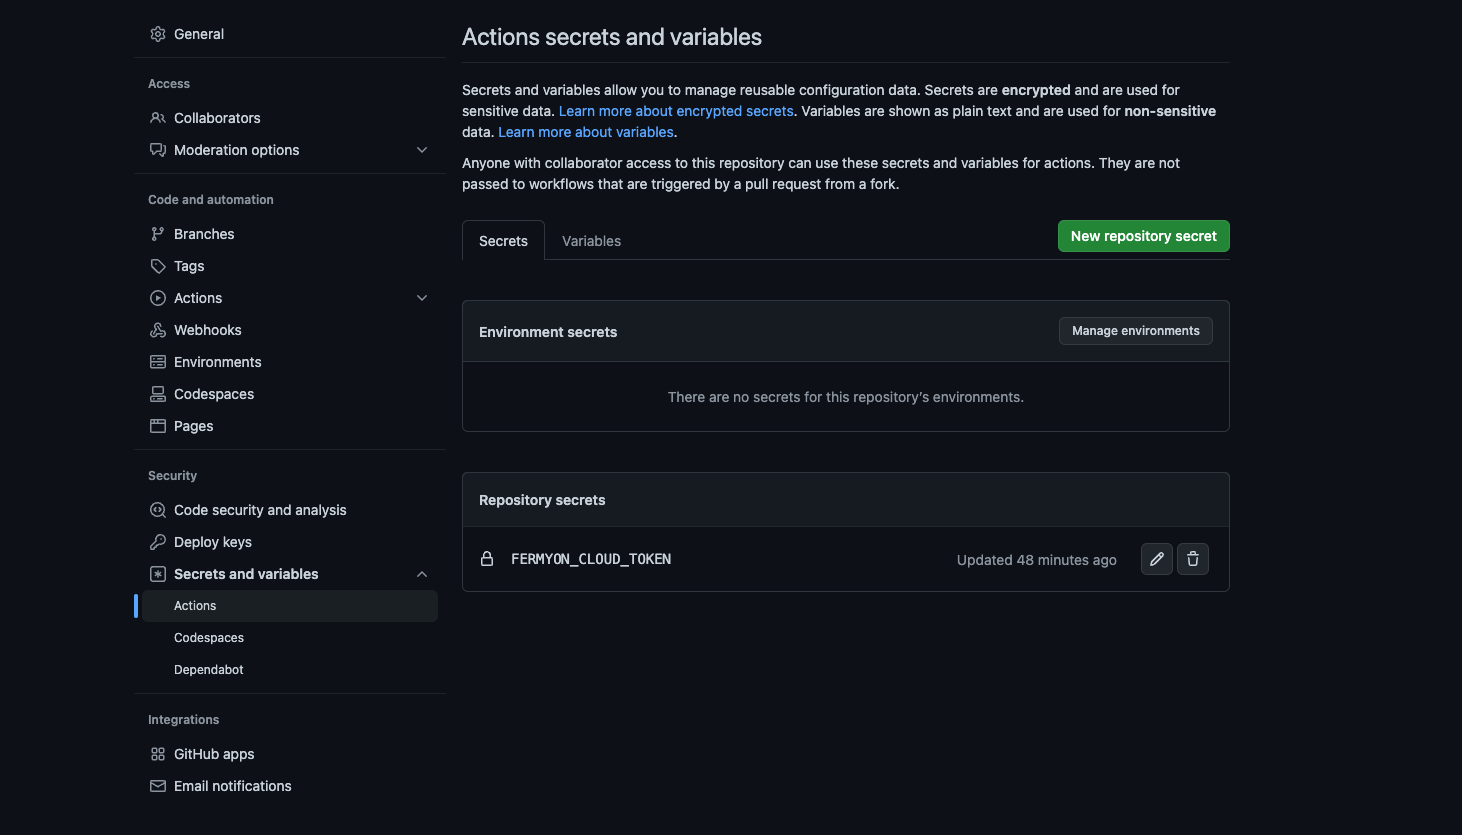
In the left hand navigation bar, find the Security section and choose “Secrets and variables” > Actions.
Choose the “New repository secret” button.
In the Name box, enter FERMYON_CLOUD_TOKEN.
In the Secret box, paste the token you copied above.

Switch back to your command prompt. Be sure you are in the github-actions-tutorial working copy and run:
$ gh secret set FERMYON_CLOUD_TOKEN
? Paste your secret
At the prompt, paste the token you copied above, and press Enter.
Create the Deployment Workflow
Finally it is time to create the deployment workflow! A workflow is stored as a YAML file in the .github/workflows directory.
Make sure you are in your Spin application directory, and create the workflows directory:
# Create workflows directory (and make parent directory as necessary via the -p option)
$ mkdir -p .github/workflows/
Now create a file named deploy.yml in that directory:
# For the sake of example this invokes Visual Studio Code, but you
# can use any text editor from vi to Notepad
$ code .github/workflows/deploy.yml
Then add the following code to the deploy.yml file:
name: Deploy

# Deploy only when a change is pushed or merged to `main`
on:
  push:
    branches:
      - main

jobs:
  spin:
    runs-on: ubuntu-latest
    name: Build and deploy
    steps:
      - uses: actions/checkout@v3

      - name: Install Rust
        uses: dtolnay/rust-toolchain@stable
        with:
          toolchain: 1.66
          targets: wasm32-wasi

      - name: Install Spin
        uses: fermyon/actions/spin/setup@v1

      - name: Build and deploy
        uses: fermyon/actions/spin/deploy@v1
        with:
          fermyon_token: ${{ secrets.FERMYON_CLOUD_TOKEN }}
name: Deploy

# Deploy only when a change is pushed or merged to `main`
on:
  push:
    branches:
      - main

jobs:
  spin:
    runs-on: ubuntu-latest
    name: Build and deploy
    steps:
      - uses: actions/checkout@v3

      # TypeScript/JavaScript build requires the js2wasm plugin
      - name: Install Spin
        uses: fermyon/actions/spin/setup@v1
        with:
          plugins: js2wasm

      - name: Run npm install
        run: npm install

      - name: Build and deploy
        uses: fermyon/actions/spin/deploy@v1
        with:
          fermyon_token: ${{ secrets.FERMYON_CLOUD_TOKEN }}
name: Deploy

# Deploy only when a change is pushed or merged to `main`
on:
  push:
    branches:
      - main

jobs:
  spin:
    runs-on: ubuntu-latest
    name: Build and deploy
    steps:
      - uses: actions/checkout@v3

      # Python build requires the py2wasm plugin
      - name: Install Spin
        uses: fermyon/actions/spin/setup@v1
        with:
          plugins: py2wasm

      - name: Build and deploy
        uses: fermyon/actions/spin/deploy@v1
        with:
          fermyon_token: ${{ secrets.FERMYON_CLOUD_TOKEN }}
name: Deploy

# Deploy only when a change is pushed or merged to `main`
on:
  push:
    branches:
      - main

jobs:
  spin:
    runs-on: ubuntu-latest
    name: Build and deploy
    steps:
      - uses: actions/checkout@v3

      - name: "Install Go"
        uses: actions/setup-go@v3
        with:
          go-version: "1.20"

      - name: "Install TinyGo"
        uses: rajatjindal/setup-actions/tinygo@v0.0.1
        with:
          version: v0.27.0

      - name: Install Spin
        uses: fermyon/actions/spin/setup@v1

      - name: Build and deploy
        uses: fermyon/actions/spin/deploy@v1
        with:
          fermyon_token: ${{ secrets.FERMYON_CLOUD_TOKEN }}
Save the file.
If you’re interested in learning more about configuring and understanding GitHub Actions, we recommend checking out GitHub’s article.
Push the Workflow to GitHub
Now it’s time to put our GitHub Action to the test. Run the following commands to push your local changes to the GitHub repository and trigger a Spin application deployment on Fermyon Cloud.
$ git add .
$ git commit -m "Deployment workflow"
$ git push
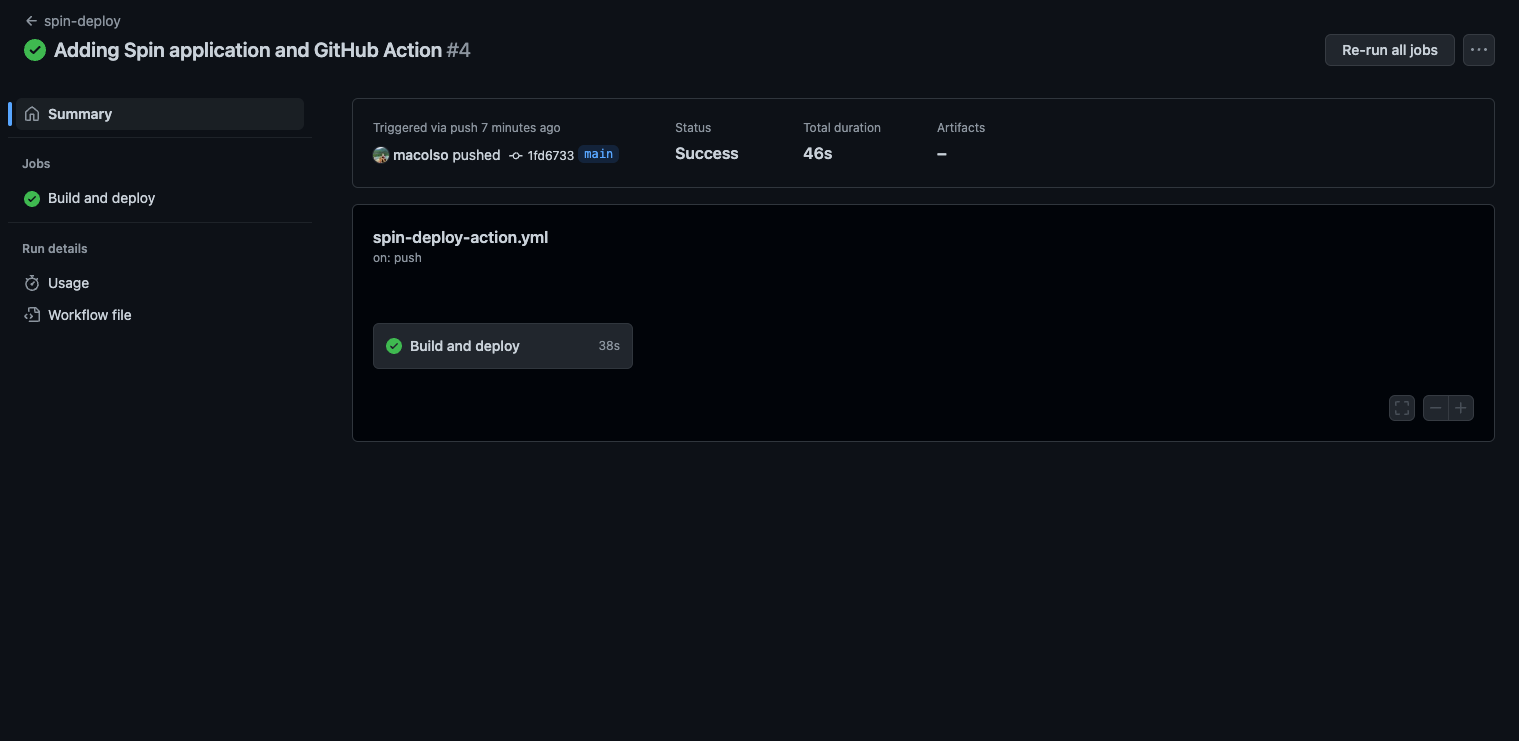
You should see a successful run on your GitHub Actions view on GitHub.

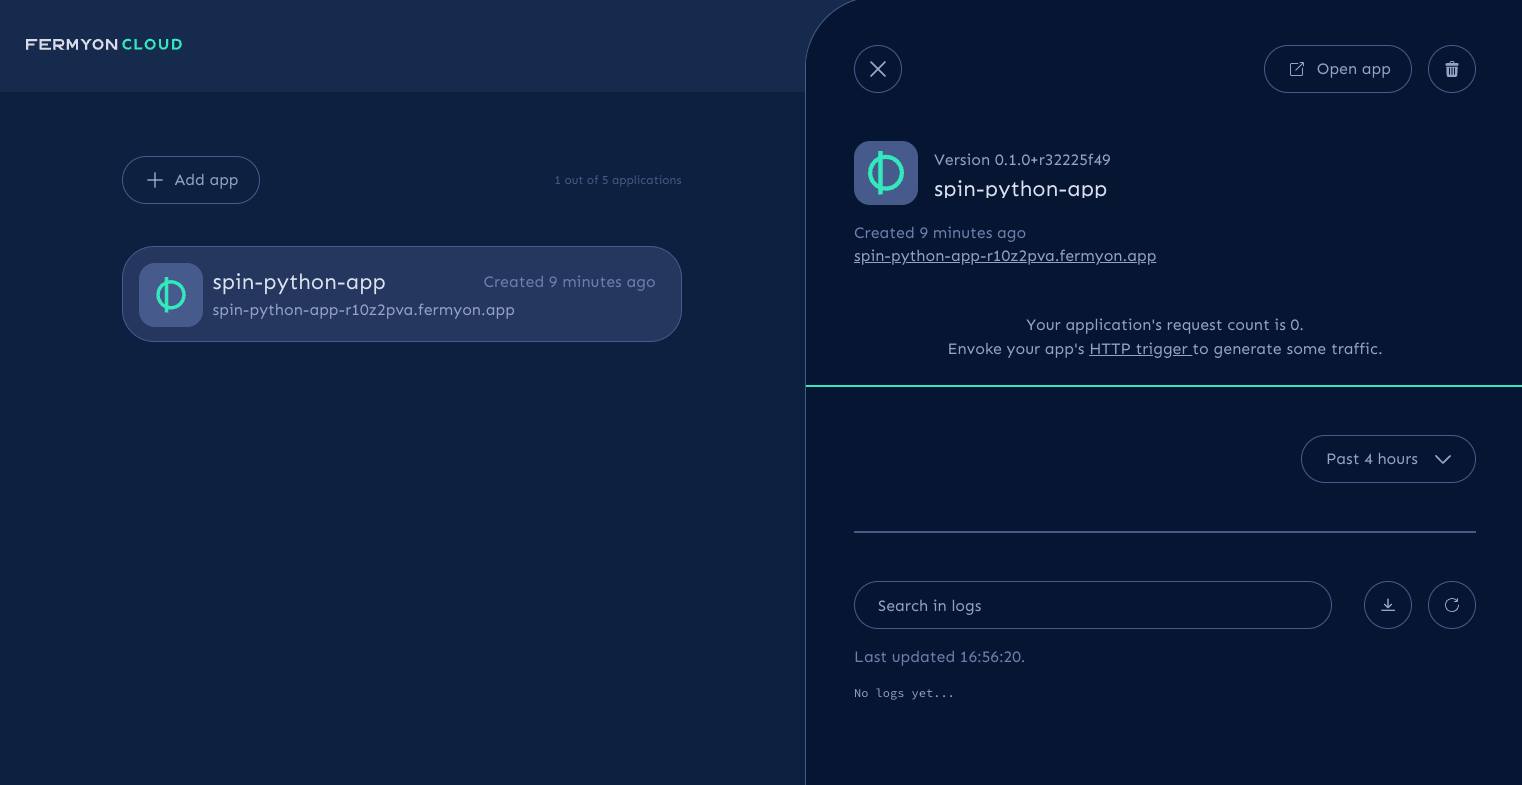
You should also see your Spin application in Fermyon Cloud.

You can expand the “Build and deploy” step in the Actions log to see a link to the deployed application.
Congratulations on deploying your first Spin application using GitHub Actions!
Next Steps
- Learn more about the Fermyon GitHub Actions collection
- To learn more about how to develop Spin applications, head over to the Spin documentation
- Find known issues and file new ones in the Fermyon Cloud Feedback repository


